Unleash Your Inner Vlogger: A Guide to Shooting and Editing Captivating Vlogs with CapCut
Vlogs have become a ubiquitous form of online communication, transforming the way we share our lives, passions, and perspectives. From documenting travel adventures and daily routines to offering tutorials and sharing opinions, vlogging provides a powerful and authentic medium to connect with a global audience. The rise of smartphones equipped with high-quality cameras, coupled with the accessibility of user-friendly video editing applications like CapCut, has democratized video creation, making it possible for anyone to become a vlogger and share their unique voice.
Toc
- 1. 1. Pre-Production: Setting the Stage for a Successful Vlog
- 2. 2. Filming Techniques: Capturing Engaging Vlog Footage
- 3. Related articles 01:
- 4. 3. Editing Your Vlog with CapCut: Polishing Your Content
- 5. Related articles 02:
- 6. 4. Exporting and Sharing Your Vlog: Reaching Your Audience
- 7. Essential Tips and Tricks for Vlog Success
- 8. Conclusion: Embrace the World of Vlogging with CapCut
CapCut, developed by the creators of TikTok, stands out as an exceptional mobile video editing app tailored perfectly for vloggers. Its intuitive interface, combined with a rich array of features and effects, empowers users to transform raw smartphone footage into polished, engaging vlogs, all within the convenience of their mobile device. This comprehensive guide will walk you through the essential steps of shooting and editing vlogs using CapCut, from initial planning to final export, equipping you with the knowledge and skills to create compelling content that resonates with viewers.
1. Pre-Production: Setting the Stage for a Successful Vlog

Before you even pick up your phone to film, investing time in pre-production is paramount. Thoughtful planning will streamline your workflow, save you time during editing, and ensure your vlog is focused, engaging, and achieves its intended purpose.
-
Brainstorming Vlog Ideas and Topics:
- Identify Your Niche: What are you passionate about? What unique perspective or expertise can you offer? Vlogs thrive on authenticity, so choose topics that genuinely interest you. Consider your hobbies, travel experiences, skills, opinions, or daily life aspects that could be engaging to others.
- Target Audience: Who are you trying to reach with your vlog? Understanding your target audience will help you tailor your content, tone, and style to resonate with them. Consider their interests, age group, and online habits.
- Trending Topics: Stay informed about current trends and popular themes within the vlogging community and your chosen niche. While originality is key, aligning your content with trending topics can increase discoverability and attract new viewers.
- Keyword Research: If you aim to grow your vlog channel, consider researching relevant keywords related to your vlog topics. Incorporating these keywords into your video titles, descriptions, and tags can improve search engine optimization (SEO) and help viewers find your content.
-
Scripting or Outlining Your Vlog Content:
- Structure is Key: Even if you prefer a spontaneous vlogging style, having a basic outline or script is highly beneficial. A structure provides direction, prevents rambling, and ensures you cover all essential points within a reasonable timeframe.
- Key Talking Points: Jot down the main topics, points, or stories you want to cover in your vlog. This could be a list of activities for a daily vlog, steps in a tutorial, or arguments in an opinion piece.
- Visual Elements: Plan the visual elements that will accompany your talking points. Consider B-roll footage (supplementary visuals), graphics, or on-screen text that can enhance engagement and illustrate your message.
- Call to Action: Decide on your call to action. Do you want viewers to subscribe, leave comments, visit your website, or follow you on social media? Plan when and how you will incorporate this call to action into your vlog.
-
Preparing Your Equipment for Filming:
- Smartphone Camera: Ensure your smartphone camera lens is clean and free of smudges. Familiarize yourself with your phone’s camera settings, including resolution, frame rate, and stabilization options.
- External Microphone (Recommended): Audio quality is paramount in vlogs. Invest in an external microphone, such as a lavalier mic (clip-on) or a shotgun mic, to significantly improve audio clarity and reduce background noise.
- Tripod or Stabilizer: A tripod or gimbal stabilizer is essential for achieving smooth, professional-looking footage, especially if you plan to move around while filming. Tripods are ideal for static shots, while gimbals are better for dynamic, moving shots.
- Lighting (Optional but Beneficial): While natural light is often sufficient for vlogging, consider investing in a portable ring light or softbox, especially if you frequently film indoors or in low-light conditions. Good lighting enhances the visual appeal of your vlog.
- Charged Batteries and Storage: Ensure your smartphone and any external microphones or lights are fully charged. Clear sufficient storage space on your phone to accommodate your vlog footage.
-
Choosing a Suitable Filming Location:
- Consider Your Vlog Topic: The filming location should be relevant to your vlog topic and contribute to the overall aesthetic and message. A travel vlog might feature scenic outdoor locations, while a cooking vlog would naturally be filmed in a kitchen.
- Lighting and Sound: Prioritize locations with good natural light and minimal background noise. Avoid filming in overly crowded or noisy environments unless the noise is part of your vlog’s theme.
- Visual Appeal: Choose locations that are visually interesting and aesthetically pleasing. A visually appealing backdrop enhances viewer engagement.
- Permissions and Logistics: If filming in public spaces, be aware of any permits or permissions you might need. Consider logistical factors like accessibility, power outlets (if needed for lighting or equipment), and comfort.
2. Filming Techniques: Capturing Engaging Vlog Footage
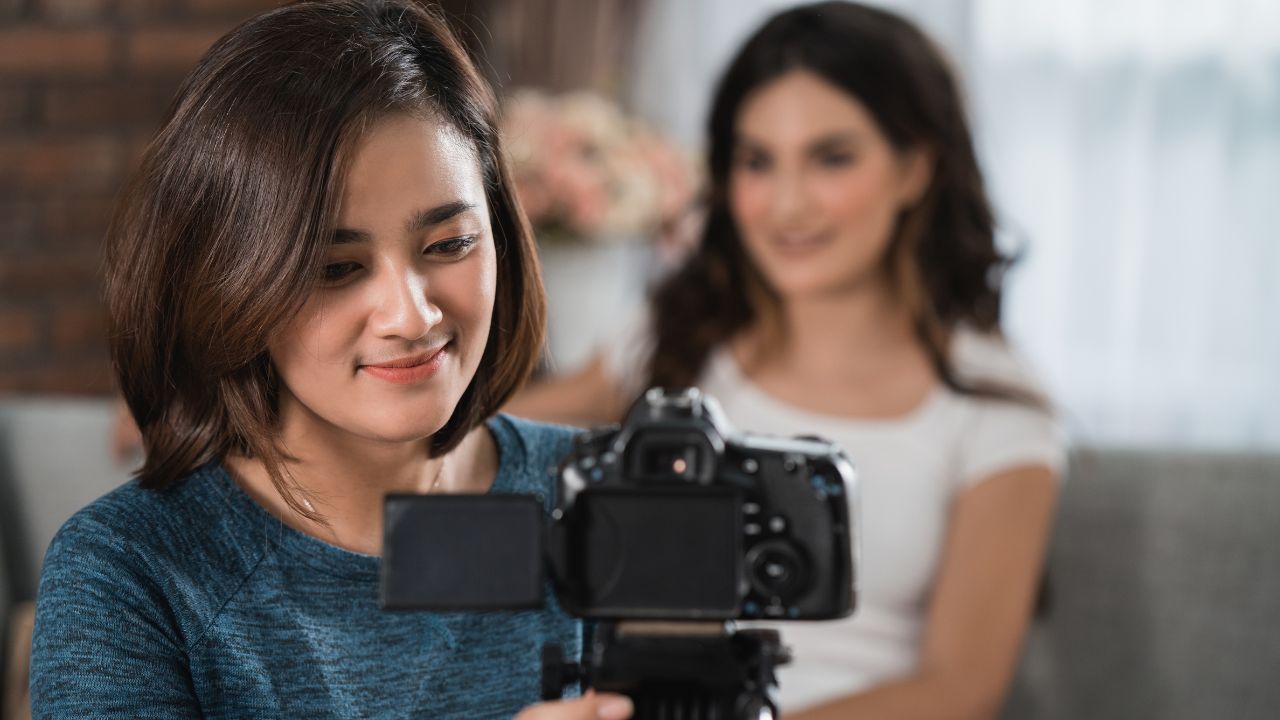
Effective filming techniques are crucial for creating vlogs that are visually appealing and hold viewers’ attention. Mastering these techniques will elevate the quality of your content and make your vlogs more enjoyable to watch.
-
Camera Angles: Varying Perspectives:
1. https://cacutproapk.com/navigating-the-fast-lane-challenges-faced-by-sellers-on-tiktok
2. https://cacutproapk.com/the-rise-of-the-short-form-shop-exploring-tiktoks-e-commerce-platform
3. https://cacutproapk.com/capcut-vs-kinemaster-which-video-editor-reigns-supreme-in-2024
4. https://cacutproapk.com/capcut-a-users-perspective-on-accessible-video-editing
- Eye-Level Shot: This is the most common and natural angle for vlogs, creating a direct and personal connection with the viewer. Film yourself at eye level to simulate a conversation.
- Wide Shot (Establishing Shot): Use wide shots to establish the scene, showcase your surroundings, or introduce a new location. Wide shots provide context and visual variety.
- Close-Up Shot: Employ close-ups to emphasize details, emotions, or specific actions. Close-ups can be used to highlight your facial expressions, show details of an object, or focus on a particular cooking step in a food vlog.
- Over-the-Shoulder Shot: This angle can be effective for tutorials or demonstrations, allowing viewers to see what you are doing from your perspective.
-
Framing and Composition: Guiding the Viewer’s Eye:
- Rule of Thirds: Imagine your screen divided into nine equal rectangles by two horizontal and two vertical lines. Position key elements of your shot along these lines or at their intersections to create visually balanced and interesting compositions.
- Headroom: Leave a comfortable amount of space above your head in your shots. Avoid cutting off the top of your head unless for a specific artistic effect.
- Leading Lines: Utilize natural lines in your environment (roads, paths, fences, etc.) to guide the viewer’s eye towards the main subject of your shot.
- Background Awareness: Be mindful of your background. Ensure it is not distracting or cluttered. A clean and simple background often keeps the focus on you and your message.
-
Lighting: Illuminating Your Story:
- Natural Light is King: Whenever possible, film in natural daylight. Position yourself facing a window or film outdoors during golden hour (sunrise and sunset) for warm, flattering light.
- Avoid Harsh Shadows: Diffuse harsh sunlight with a sheer curtain or film in shaded areas to prevent unflattering shadows on your face.
- Artificial Lighting (Supplement): If natural light is insufficient, use artificial lighting to supplement. Ring lights are popular for vloggers as they provide even, soft light and minimize shadows. Softboxes offer a larger, more diffused light source for a softer look.
- Color Temperature: Be mindful of color temperature. Mix-matching different color temperatures (e.g., warm indoor lights and cool daylight) can create an unnatural look. Aim for consistent color temperature throughout your vlog.
-
Audio: Capturing Clear and Engaging Sound:
- Prioritize Audio Quality: Viewers are more forgiving of slightly imperfect video quality than poor audio. Invest in good audio and prioritize clear sound.
- External Microphone is Essential: The built-in microphones on smartphones are often inadequate for vlogging, especially in noisy environments. Use an external microphone to capture clear, crisp audio and minimize background noise.
- Minimize Background Noise: Choose quiet filming locations whenever possible. If filming in a noisy environment, try to minimize background noise by positioning yourself closer to the microphone or using noise-canceling microphones.
- Monitor Your Audio: If possible, monitor your audio while filming using headphones to ensure you are capturing clear sound and to identify any audio issues early on.
-
Stability: Achieving Smooth Footage:
- Tripod for Static Shots: Use a tripod for any shots where you are stationary, such as talking directly to the camera or demonstrating a product. Tripods eliminate camera shake and create professional-looking static shots.
- Gimbal for Moving Shots: If you plan to move around while filming, a gimbal stabilizer is invaluable. Gimbals use motors and sensors to counteract camera shake, allowing you to capture smooth, cinematic-looking walking shots or dynamic movements.
- Steady Hands: If you don’t have a tripod or gimbal, practice holding your phone with steady hands. Use both hands, keep your elbows tucked in, and brace yourself against a stable surface if possible.
-
Engaging with the Camera: Connecting with Your Audience:
- Eye Contact: Look directly into the camera lens when speaking to your audience. This creates a sense of direct connection and makes viewers feel like you are talking to them personally.
- Energy and Enthusiasm: Convey energy and enthusiasm in your delivery. Your personality and passion are key to engaging viewers. Speak clearly, vary your tone, and use natural gestures.
- Be Yourself: Authenticity is paramount in vlogging. Let your personality shine through. Don’t try to be someone you’re not. Viewers connect with genuine personalities.
- Natural Conversation: Imagine you are talking to a friend. Speak naturally and conversationally, rather than reading from a script in a monotone voice.
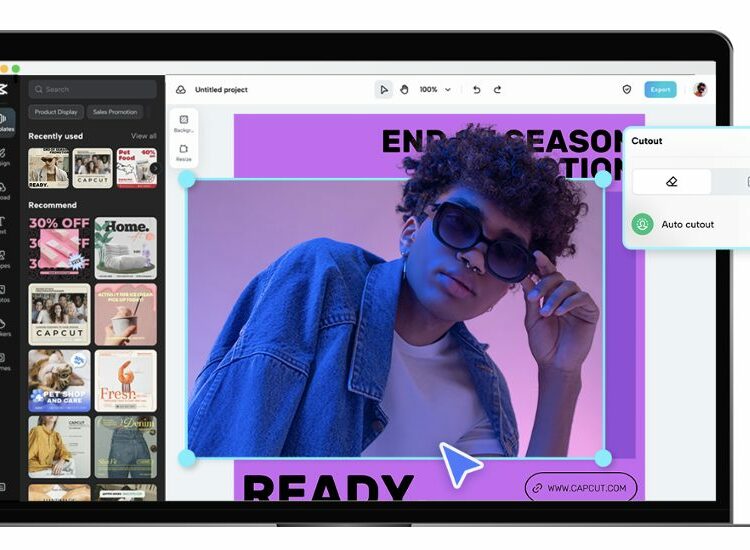
3. Editing Your Vlog with CapCut: Polishing Your Content
Once you have captured your vlog footage, the next crucial step is editing using CapCut. CapCut offers a user-friendly interface and a powerful suite of editing tools to transform your raw footage into a polished and engaging vlog.
-
Importing Footage into CapCut:
- New Project: Open the CapCut app and tap on “New project.”
- Select Videos: Choose the video clips you want to edit from your phone’s gallery and tap “Add.” CapCut will import your selected footage into the editing timeline.
-
Cutting and Trimming Clips: Refining Your Narrative:
- Timeline Navigation: Familiarize yourself with the CapCut timeline. Pinch to zoom in and out for precise editing.
- Splitting Clips: Tap on a clip in the timeline and use the “Split” tool to divide it into two separate clips at the playhead position. This is useful for removing unwanted sections or creating separate segments.
- Trimming Clips: Select a clip and drag the yellow handles at the beginning and end of the clip to trim unwanted footage from the start or end.
- Deleting Clips: Select a clip and tap the “Delete” button (trash can icon) to remove it from the timeline.
- Arranging Clips: Tap and hold a clip to drag and reposition it in the timeline, changing the order of your vlog segments.
-
Adding Transitions: Creating Smooth Flow:
- Transition Icon: Between each clip in the timeline, you’ll see a small white box icon. Tap on this icon to access the transition menu.
- Transition Library: CapCut offers a wide library of transitions, categorized into Basic, Overlap, Glitch, and more. Explore different transitions to find those that suit your vlog style.
- Applying Transitions: Tap on a transition to preview it and tap the checkmark to apply it between the selected clips.
- Transition Duration: Adjust the duration of the transition using the slider in the transition menu. Shorter durations often create snappier transitions, while longer durations offer smoother fades.
-
Color Correction and Adjustments: Enhancing Visuals:
- Filters: Tap on a clip and select “Filters” from the bottom menu. CapCut provides a wide range of filters to quickly alter the color grading and mood of your footage. Experiment with different filters to find a style that complements your vlog.
- Adjustments: Tap on “Adjust” to access more granular color correction tools. You can adjust brightness, contrast, saturation, exposure, highlights, shadows, temperature, and more. Use these tools to fine-tune the lighting and colors of your clips, creating a consistent and visually appealing look.
- Color Grading (Advanced): For more advanced color grading, explore CapCut’s “HSL” (Hue, Saturation, Luminance) tool. HSL allows you to adjust specific color ranges within your video, giving you precise control over color manipulation.
-
Adding Text and Titles: Providing Context and Engagement:
1. https://cacutproapk.com/capcut-your-pocket-sized-travel-video-editing-studio
2. https://cacutproapk.com/capcut-old-version-apk-why-some-users-prefer-the-older-version
3. https://cacutproapk.com/navigating-the-fast-lane-challenges-faced-by-sellers-on-tiktok
4. https://cacutproapk.com/common-vlogging-mistakes-and-how-to-avoid-them-a-beginners-guide
- Text Tool: Tap on “Text” in the bottom menu. Select “Add text” to create a text layer.
- Text Customization: Type your text and customize its font, style, color, size, position, and animation. CapCut offers a variety of fonts and text styles to choose from.
- Titles and Subtitles: Use text layers to create engaging titles at the beginning of your vlog, add subtitles for accessibility, or provide on-screen annotations to explain points or highlight information.
- Text Animations: Animate your text using CapCut’s animation options. “Fade in,” “Slide,” “Zoom,” and “Typewriter” are popular animation styles for text in vlogs.
-
Adding Music and Sound Effects: Setting the Mood:
- Audio Tool: Tap on “Audio” in the bottom menu.
- Music Library: CapCut provides a built-in music library with royalty-free tracks. Browse by genre, mood, or trending sounds.
- Importing Music: Tap “Sounds” and then “From device” to import music tracks from your phone’s music library.
- Sound Effects: Explore CapCut’s sound effects library to add sound effects that enhance your vlog, such as transitions, whooshes, or ambient sounds.
- Audio Editing: Adjust the volume of music and sound effects using the volume slider. Use the “Split” tool to cut audio clips, and “Fade in/out” to create smoother audio transitions.
-
Using Stickers and Emojis: Adding Personality and Fun:
- Sticker Tool: Tap on “Stickers” in the bottom menu.
- Sticker Library: CapCut offers a vast library of stickers, emojis, and GIFs. Browse by category or search for specific stickers.
- Adding Stickers: Tap on a sticker to add it to your video. Resize, reposition, and rotate stickers using pinch and drag gestures.
- Animated Stickers: Utilize animated stickers to add dynamic elements and visual interest to your vlog.
- Emojis: Emojis can be used to add emotion, humor, or emphasis to your text or visuals.
-
Speed Adjustments: Creating Dynamic Pacing:
- Speed Tool: Tap on a clip and select “Speed” from the bottom menu.
- Speed Curves: CapCut’s speed curves offer advanced speed ramping capabilities. Choose from pre-set curves like “Hero,” “Bullet Time,” or “Jump Cut,” or create your own custom speed curves.
- Slow Motion: Slow down footage using the speed slider to emphasize moments, create dramatic effects, or highlight details.
- Speed Ramps: Use speed ramps to smoothly transition between normal speed and slow motion or fast motion, creating dynamic and engaging pacing.
-
Filters and Effects: Enhancing Visual Style:
- Filters (Revisited): Experiment with different filters to quickly change the overall look and feel of your vlog.
- Effects Library: Tap on “Effects” in the bottom menu to access CapCut’s effects library. Explore video effects like “Retro,” “Blur,” “Split Screen,” and many more.
- Effect Intensity: Adjust the intensity of effects using the slider in the effects menu. Use effects subtly to enhance your vlog without overpowering the content.
- Trending Effects: Stay up-to-date with trending effects on CapCut and experiment with incorporating them into your vlogs to keep your content fresh and relevant.
4. Exporting and Sharing Your Vlog: Reaching Your Audience
Once you have meticulously edited your vlog to perfection, the final step is exporting and sharing your masterpiece with the world.
-
Export Settings:
- Resolution: Tap the export icon (arrow pointing upwards) in the top right corner. Choose your desired resolution. 1080p (Full HD) is generally recommended for online vlogs as it offers a good balance between quality and file size. For platforms like TikTok or Instagram Reels, 720p may be sufficient.
- Frame Rate: 30fps (frames per second) is a standard frame rate for vlogs and provides smooth motion.
- Export: Tap the “Export” button. CapCut will render and export your vlog to your phone’s gallery.
-
Sharing Platforms:
- YouTube: YouTube is the primary platform for long-form vlogs. Create a YouTube channel and upload your vlog. Optimize your video title, description, tags, and thumbnail for YouTube SEO to increase visibility.
- TikTok: TikTok is ideal for shorter, more dynamic vlogs. Edit your vlog to fit TikTok’s time limits (typically 60 seconds or 3 minutes). Use trending sounds and hashtags to increase discoverability on TikTok.
- Instagram: Instagram is suitable for both short-form (Reels) and longer-form (IGTV) vlogs. Instagram Reels are similar to TikTok videos and are great for short, engaging content. IGTV allows for longer videos, similar to YouTube.
- Facebook: Facebook is a versatile platform for sharing vlogs with a wider audience, including friends and family. You can upload vlogs directly to Facebook or share YouTube or Instagram links.
- Other Platforms: Consider other platforms like Vimeo, Twitter, or personal websites depending on your target audience and vlog content.
Essential Tips and Tricks for Vlog Success
- Be Authentic and Yourself: Viewers connect with genuine personalities. Let your true self shine through in your vlogs. Don’t try to imitate other vloggers.
- Engage with Your Audience: Respond to comments, ask questions, and interact with your viewers. Building a community around your vlog is crucial for long-term success.
- Maintain Consistency: Upload vlogs on a regular schedule to keep your audience engaged and coming back for more. Consistency is key to growing a vlog channel.
- Learn from Other Vloggers: Watch successful vloggers in your niche and analyze their techniques, editing styles, and content strategies. Learn from their best practices and adapt them to your own style.
- Practice and Experiment: The more you vlog, the better you will become. Don’t be afraid to experiment with different filming styles, editing techniques, and content formats. Practice is the best way to improve your vlogging skills.
- Promote Your Vlog: Share your vlogs across your social media platforms to reach a wider audience. Use relevant hashtags and engage with other creators in your niche to increase visibility.
- Analyze Your Analytics: Pay attention to your video analytics on YouTube, TikTok, or Instagram. Analyze which videos perform well, what your audience responds to, and use this data to inform your future content creation.
Conclusion: Embrace the World of Vlogging with CapCut
CapCut empowers you to transform your mobile device into a powerful vlogging studio. By mastering the shooting and editing techniques outlined in this guide, you can create captivating vlogs that express your unique voice, connect with audiences, and share your stories with the world. Embrace your inner vlogger, unleash your creativity, and start your vlogging journey with CapCut today! The world is waiting to hear your story.