Elevate Your Editing Game: A Comprehensive Guide to Installing CapCut on Your Computer
CapCut has rapidly gained popularity as a versatile and user-friendly video editing application, initially making waves on mobile platforms. Recognizing the demand for a robust desktop editing solution, the creators have brought CapCut to computers, offering a powerful suite of tools for both novice and experienced video editors. Installing CapCut on your computer unlocks a world of creative possibilities, allowing you to craft engaging videos with precision and efficiency on a larger screen.
This comprehensive guide will walk you through the step-by-step process of installing CapCut on your Windows or macOS computer, ensuring a smooth and hassle-free experience. Whether you’re a content creator, a social media enthusiast, or simply looking to enhance your personal video projects, this guide will equip you with the knowledge to get CapCut up and running on your machine.
Before You Begin: Checking System Requirements
Before diving into the installation process, it’s crucial to ensure that your computer meets the minimum system requirements for CapCut. This will help prevent potential compatibility issues and ensure optimal performance. While the exact requirements may vary slightly with updates, here are some general guidelines:
For Windows:
- Operating System: Windows 7 Service Pack 1 or later (64-bit recommended)
- Processor: Intel Core i3 or equivalent AMD processor
- RAM: 4GB or more (8GB recommended for smoother editing)
- Graphics Card: Intel HD Graphics 5000 or later, NVIDIA GeForce GTX 650 or later, AMD Radeon HD 7750 or later
- Storage: At least 2GB of free disk space for installation
For macOS:
- Operating System: macOS 10.13 or later
- Processor: Intel Core i5 or later, or Apple silicon
- RAM: 4GB or more (8GB recommended for smoother editing)
- Graphics Card: Intel HD Graphics 4000 or later, AMD Radeon R9 M290 or later, or Apple silicon integrated graphics
- Storage: At least 2GB of free disk space for installation
Checking your computer’s specifications is a simple process. On Windows, you can usually find this information by searching for “System Information” in the Start Menu. On macOS, you can access it by clicking on the Apple menu in the top-left corner and selecting “About This Mac.”
Step-by-Step Guide for Installing CapCut on Windows:
If your computer meets the necessary requirements, you can proceed with the installation of CapCut on your Windows machine. Here’s how:
-
Navigate to the Official CapCut Website: Open your preferred web browser (e.g., Chrome, Firefox, Edge) and go to the official CapCut website. It’s crucial to download the installer from the official source to avoid downloading potentially harmful software. You can usually find the download link for the desktop version prominently displayed on their homepage or a dedicated download section.
-
Download the CapCut Installer: Look for the button or link that says “Download for Windows” or similar. Click on it to begin the download process. The installer file will typically be saved in your browser’s default download location. The file will likely be an executable file with a “.exe” extension.
-
Locate the Downloaded File: Once the download is complete, open your File Explorer and navigate to your Downloads folder (or the folder where your browser saves downloaded files). You should see the CapCut installer file listed there.
-
Run the Installer: Double-click on the CapCut installer file (.exe) to begin the installation process. You might see a User Account Control (UAC) prompt asking if you want to allow the application to make changes to your device. Click “Yes” to proceed.
-
Review and Accept the License Agreement: The CapCut installation wizard will appear. Carefully read the license agreement. If you agree to the terms, check the box that indicates your acceptance and click “Install” or “Next.”
-
Choose the Installation Location (Optional): The installer will typically suggest a default installation location. If you prefer to install CapCut in a different folder, you can usually click a “Browse” button and select your desired location. However, for most users, the default location is suitable.
-
Wait for the Installation to Complete: Once you’ve confirmed the installation settings, the installer will begin copying the necessary files to your computer. A progress bar will indicate the status of the installation. This process may take a few minutes depending on your system’s speed.
-
Launch CapCut: Once the installation is complete, the installer will usually provide an option to launch CapCut immediately. You can check the box next to “Launch CapCut” and click “Finish” or “Close.” Alternatively, you can find the CapCut shortcut on your desktop or in your Start Menu and double-click it to open the application.
Step-by-Step Guide for Installing CapCut on macOS:
Installing CapCut on a macOS computer follows a slightly different process:
-
Navigate to the Official CapCut Website: Open your preferred web browser (e.g., Safari, Chrome, Firefox) and go to the official CapCut website. Look for the download link for the macOS version.
-
Download the CapCut Installer: Click on the button or link that says “Download for macOS” or similar. The installer file will typically be saved in your browser’s default download location. The file will likely be a disk image file with a “.dmg” extension.
-
Locate the Downloaded File: Once the download is complete, open Finder and navigate to your Downloads folder. You should see the CapCut disk image file (.dmg) listed there.
-
Mount the Disk Image: Double-click on the CapCut disk image file (.dmg). This will mount the disk image, and a new window will appear containing the CapCut application icon.
-
Drag and Drop to Applications Folder: In the newly opened window, you will see the CapCut application icon. Click and drag this icon to the “Applications” folder icon, which is usually located in the same window or in the Finder sidebar. This action copies the CapCut application to your Applications folder.
-
Eject the Disk Image: Once the application has been copied, you can eject the disk image. To do this, find the CapCut disk image in the Finder sidebar (usually under “Devices”) and click the eject button (the small upward-pointing arrow) next to it.
-
Launch CapCut: Open your Applications folder (you can find it in the Finder sidebar or by going to “Go” in the menu bar and selecting “Applications”). Locate the CapCut application icon and double-click it to launch the application. You might see a security prompt asking if you’re sure you want to open an application downloaded from the internet. Click “Open” to proceed.
Initial Setup and First Launch:

The first time you launch CapCut on your computer, you might be prompted to agree to the terms and conditions. Read through them carefully and click “Agree” or “Accept” to continue. You might also be asked to log in or create a CapCut account. While not always mandatory for basic editing, having an account can allow you to save projects to the cloud and access them across different devices.
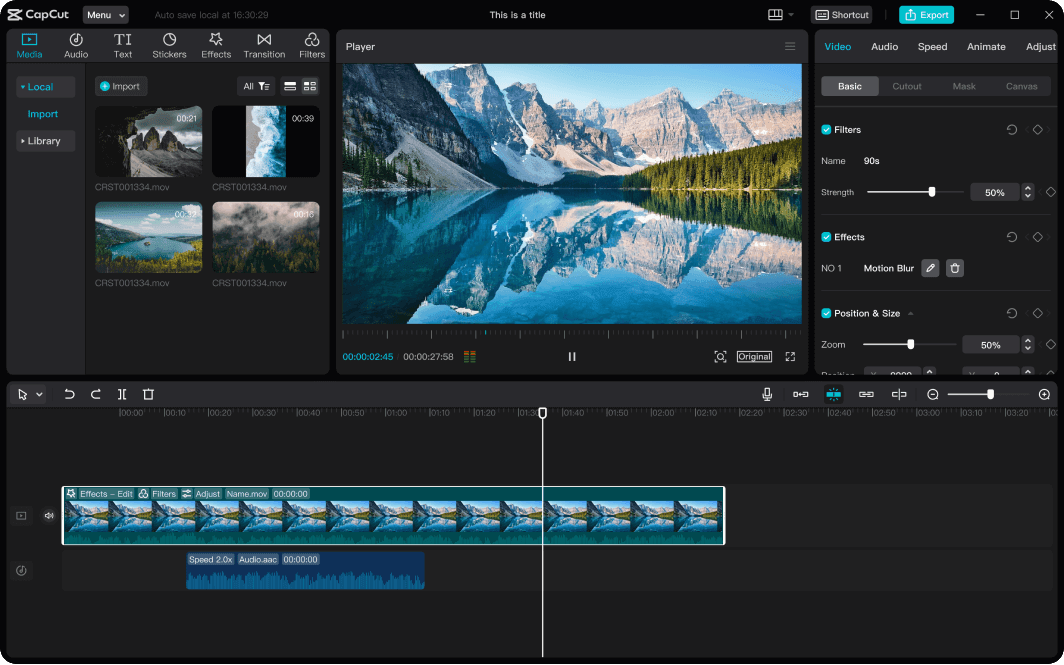
Upon successful launch, you’ll be greeted with the CapCut interface. Take some time to familiarize yourself with the layout, including the media bin, timeline, preview window, and various editing tools.
Troubleshooting Common Installation Issues:
While the installation process is generally straightforward, you might encounter some issues. Here are a few common problems and potential solutions:
- Insufficient Disk Space: If your computer doesn’t have enough free disk space, the installation might fail. Ensure you have at least the recommended amount of free space before attempting to install CapCut.
- Operating System Incompatibility: Make sure your operating system meets the minimum requirements mentioned earlier. Installing CapCut on an unsupported operating system can lead to errors or instability.
- Installation Errors: If you encounter an error message during the installation process, try restarting your computer and attempting the installation again. You can also try temporarily disabling your antivirus software, as it might sometimes interfere with the installation.
- Corrupted Installer File: If the installer file was not downloaded completely or became corrupted during the download process, it might cause installation issues. Try downloading the installer file again from the official CapCut website.
Conclusion:
Installing CapCut on your computer is a relatively simple process that empowers you to take your video editing skills to the next level. By following the step-by-step guides provided for both Windows and macOS, you can quickly and easily get CapCut up and running on your machine. With its intuitive interface and a wide range of powerful features, CapCut offers a fantastic platform for creating captivating videos for various purposes. So, go ahead, install CapCut, and start unleashing your creativity!